How to Choose Large Landscape Wall Art for Above the Sofa
The wall above a sofa often carries the visual weight of an entire living room. It sits near the largest piece of furniture, remains visible from several angles, and has enough uninterrupted space to make a landscape feel almost architectural.
That opportunity also makes the wall difficult. A beautiful print can still look undersized, too high, or detached once framed. A panorama can overwhelm a compact room; a gentle scene can disappear against similar walls and upholstery.
The right choice begins with the room, not with a standard-size frame. Measure the furniture and wall, study the landscape’s proportions, and decide what role the image should play.

1. Read the Wall as Part of the Room’s Architecture
Before choosing a scene, map what already occupies the wall. Measure the sofa’s outer width, the clear wall width, the distance from the sofa back to the ceiling or nearest architectural feature, and the positions of sconces, windows, switches, shelves, and vents.
Also note whether the sofa is centered on the wall. A sectional may extend farther on one side, or a floor lamp may create a counterweight. Centering art over the sofa’s visual mass is often more coherent than centering it on the wall, but surrounding architecture still matters.
Stand at the room’s main entrance and identify the dominant horizontal lines: sofa back, window sill, console, and shelf. A landscape usually works best when it joins that rhythm. Treat any plan made from a photograph as illustrative until actual measurements are available.

2. Estimate a Useful Width From the Sofa
A common starting heuristic is to make the total framed art width roughly 60–75% of the sofa width. This range is not a rule. Arm shape, nearby lamps, ceiling height, wall width, and the darkness of the image can all justify moving outside it.
For an 84-inch sofa, that heuristic suggests testing an outer frame width of approximately 50–63 inches. The figure refers to the complete framed piece, not just the printed image. A wide moulding or large mat may add several inches.
If one print cannot reach the needed width without exceeding the available file quality or budget, consider a diptych or triptych. Calculate the group accurately:
Total group width = sum of all outer frame widths + sum of all gaps.
Three 18-inch frames with two 3-inch gaps occupy 60 inches. The same three frames with two 5-inch gaps occupy 64 inches. Those extra four inches are visible in the finished composition.
Use painter’s tape to mark the proposed outer edge. Leave it up for a day. View it from the doorway, the opposite chair, and the adjacent dining area if the plan is open. The goal is not to hit a formula perfectly; it is to create a believable relationship between art and furniture.
3. Match Height and Aspect Ratio to the Available Wall
Landscape art is horizontal, but horizontal formats vary widely. A 4:3 composition feels substantial and room-like. A 3:2 format is broader. A panorama may be 2:1 or wider, creating a strong architectural band.
Measure the available height from the sofa back to the ceiling, moulding, or shelf. Then subtract the intended gap below the art and enough breathing room above it. What remains is the maximum outer-frame height that fits comfortably.
Do not force a favorite image into an incompatible shape. Stretching a landscape damages its proportions. Aggressive cropping can remove the path, horizon, tree, or figure that organizes the scene. Choose a print and frame combination that respects the artwork’s native ratio, or use a mat to adapt the outer frame.
As an example, a 3:2 file can scale proportionally to 36 × 24 inches, while a 2:1 panorama can scale to 48 × 24 inches. These numbers describe ratio only; they do not guarantee that a particular file can print sharply at that size.
For the latter question, the guide How Large Can You Print Digital Wall Art Without Losing Quality explains how pixel dimensions, chosen PPI, viewing distance, and printer requirements interact. PPI should be treated as a quality assumption suited to the intended viewing distance, not as a magic number supplied by metadata.
4. Use Horizons and Focal Points to Shape the Room
A landscape is not simply a rectangle of color. Its horizon and focal point affect how the room feels.
A low horizon gives more space to sky and can make a compact room feel open. A high horizon places more emphasis on land, fields, water, or foreground texture and often feels more enveloping. A centered road, river, or path pulls the eye into depth. A tree or building placed off-center introduces asymmetry that can balance a floor lamp or side table.
Consider where the main focal point will fall above the sofa. It does not need to sit in the exact middle, but it should not collide visually with a tall lamp, plant, or sconce. If the landscape has a strong dark tree on the right and the room has a large bookcase on the same side, the combined weight may feel lopsided. Reversing furniture positions, choosing a different scene, or adjusting the frame group can restore balance.
For examples of how open land and distant views affect an interior, Havenest Pastoral Landscapes for Peaceful Rooms explores the emotional and spatial character of pastoral imagery.
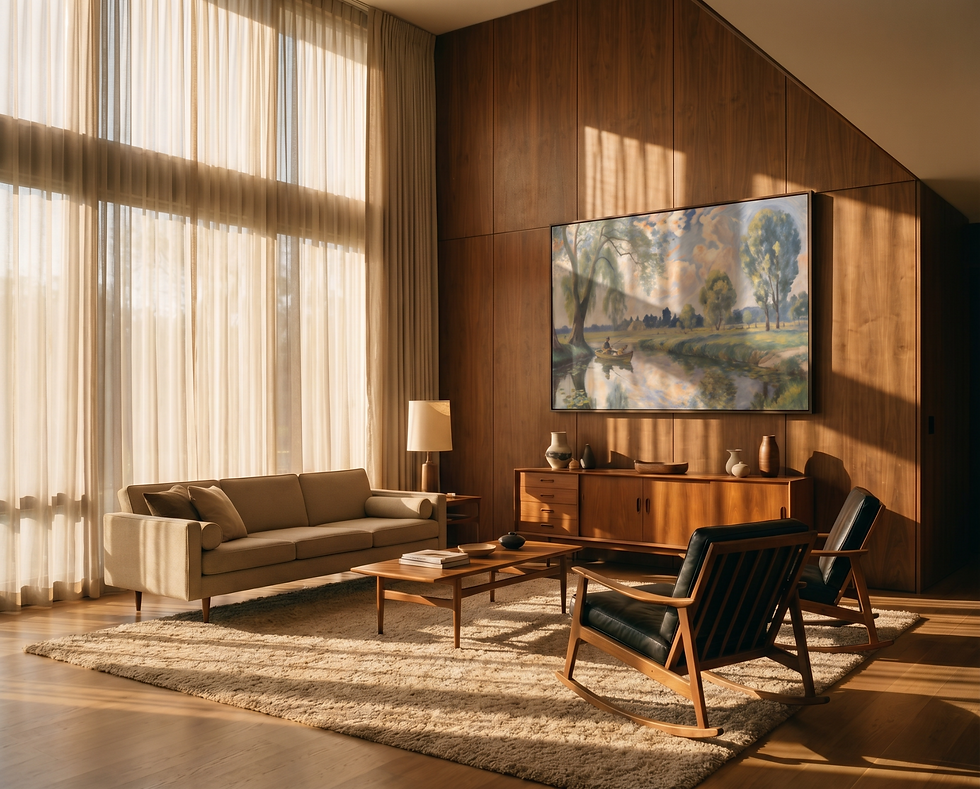
5. Coordinate Color and Contrast Without Overmatching
Begin with the sofa, but do not ask the artwork to repeat its color exactly. A beige sofa does not require a beige landscape. It needs a relationship.
Pull one or two undertones from the room into the art: olive from a rug, rust from a leather chair, blue-gray from a stone fireplace, or cream from the curtains. Then allow the image to introduce one deeper or fresher note. That controlled difference gives the wall a focal point.
Pay attention to value, the relative lightness or darkness of a color. Pale art on a pale wall may need a darker frame or more distinct shadow shapes. A deep, moody landscape above a dark sofa may benefit from a light mat, warm wall color, or enough negative space to prevent the arrangement from becoming a single heavy block.
Test the image in the room’s real light. Screens are luminous; paper is reflective. Colors may print more subdued, and daylight alters both paint and art. If color is crucial, make a small proof before ordering the largest size.
6. Choose a Frame, Mat, and Hanging Position
The frame should support the landscape and the room’s materials. Natural oak works well with linen, pale woods, and casual rooms. Walnut adds depth beside cream upholstery and traditional furniture. A narrow black or dark-bronze frame gives a clean edge in contemporary interiors and can repeat window or lighting hardware.
Large frames need enough visual substance to avoid looking flimsy, but a very wide moulding also increases the outer dimensions. Confirm the frame profile and final size before marking the wall.
A mat can separate the image from the frame, provide a gentler transition to the wall, or allow a smaller proportional print to occupy a larger outer frame. Record the printed image size, mat opening, paper size, and outer frame size separately. Do not assume a frame labeled 24 × 36 inches has those exact outer dimensions; labels often refer to the item it is designed to hold.
For the vertical gap, 6–10 inches between the sofa back and the bottom of the frame is a practical starting range in many rooms, but it remains a heuristic. A high-backed sofa, loose cushions, seated sightlines, or a low ceiling may require adjustment. Art hung too high loses its relationship with the sofa and begins to float.
Use hanging hardware rated for the complete frame weight and suitable for the actual wall material. Large glazing can add significant weight. Follow the frame and hardware manufacturers’ instructions, and do not infer stud locations, wiring, or load capacity from appearance alone.

7. Prepare the File and Make a Full-Size Test
Before printing, confirm the downloaded file’s pixel dimensions and aspect ratio. Divide pixel width and height by a chosen PPI to estimate print dimensions. For example, a 6000 × 4000 pixel file calculates to 20 × 13.33 inches at 300 PPI or 30 × 20 inches at 200 PPI. The lower PPI may be appropriate at a longer viewing distance, but suitability depends on the image, printer, paper, sharpening, and expected inspection distance.
Ask the printer which file format, bleed, and PPI range they prefer. If framing behind a mat, confirm whether the image needs a small overlap beyond the opening. The Digital Wall Art Guide: From Download to a Beautifully Finished Room covers the complete workflow.
Then make the most useful low-cost prototype: tape together kraft paper or printer paper at the exact outer-frame dimensions. Mark the image area and mat opening inside it. Hang the template at the proposed height and photograph the room straight on.
Check whether the width relates to the sofa, the upper wall feels crowded, nearby objects compete with the focal point, and seated viewers can see the image comfortably.
Only after those checks should you finalize the print and frame. A large landscape succeeds when it feels rooted to the sofa while opening a second, imagined distance beyond the wall.
To find a scene with the right horizon, palette, and sense of depth, browse the Havenest Etsy shop for printable landscape wall art. Choose the image first, preserve its proportions, and let measured framing turn it into part of the room’s architecture.
Written for Havenest Wall Art* — *Art for rooms that deserve a longer look.


Comments